CyberPanel is a free web hosting control panel and in this article you will learn how to create a new website and how to install WordPress on CyperPanel.
CyberPanel is a web hosting control panel like cPanel and Plesk etc, and like these hosting panels CyberPanel offers a range of features that makes hosting and managing websites and web applications very easy.
Web hosting is one of the key technologies required to make a website work and fast hosting is crucial to the performance of any website. At the heart of web hosting is the web server and web server CyberPanel has is what makes it special.
Why use CyberPanel?
CyberPanel is built with openLiteSpeed web server which is a high-performance, lightweight and one of the fastest http servers to host website and web applications. Both CyberPanel and openLiteSpeed are open-source so unlike cPanel, Plesk and other such control panels CyberPanel is free to use which helps you save on hosting costs. It’s easy to install and setup, in fact you don’t have to worry about installation when you can deploy it on the cloud using services Like Linode and DigitalOcean etc.
How to deploy CyberPanel with Linode
How to deploy CyberPanel with DigitalOcean
So here is why I choose CyberPanel to host my WordPress sites:
- High Performance compared to shared and managed WordPress Hosting
- Cost effective
- Easy to install and deploy to the cloud
- Easy and Free 1-Click SSL Certificates by Let’s Encrypt
- Host as many sites as you need
Install WordPress on CyberPanel
Step 1: Create new website on CyberPanel
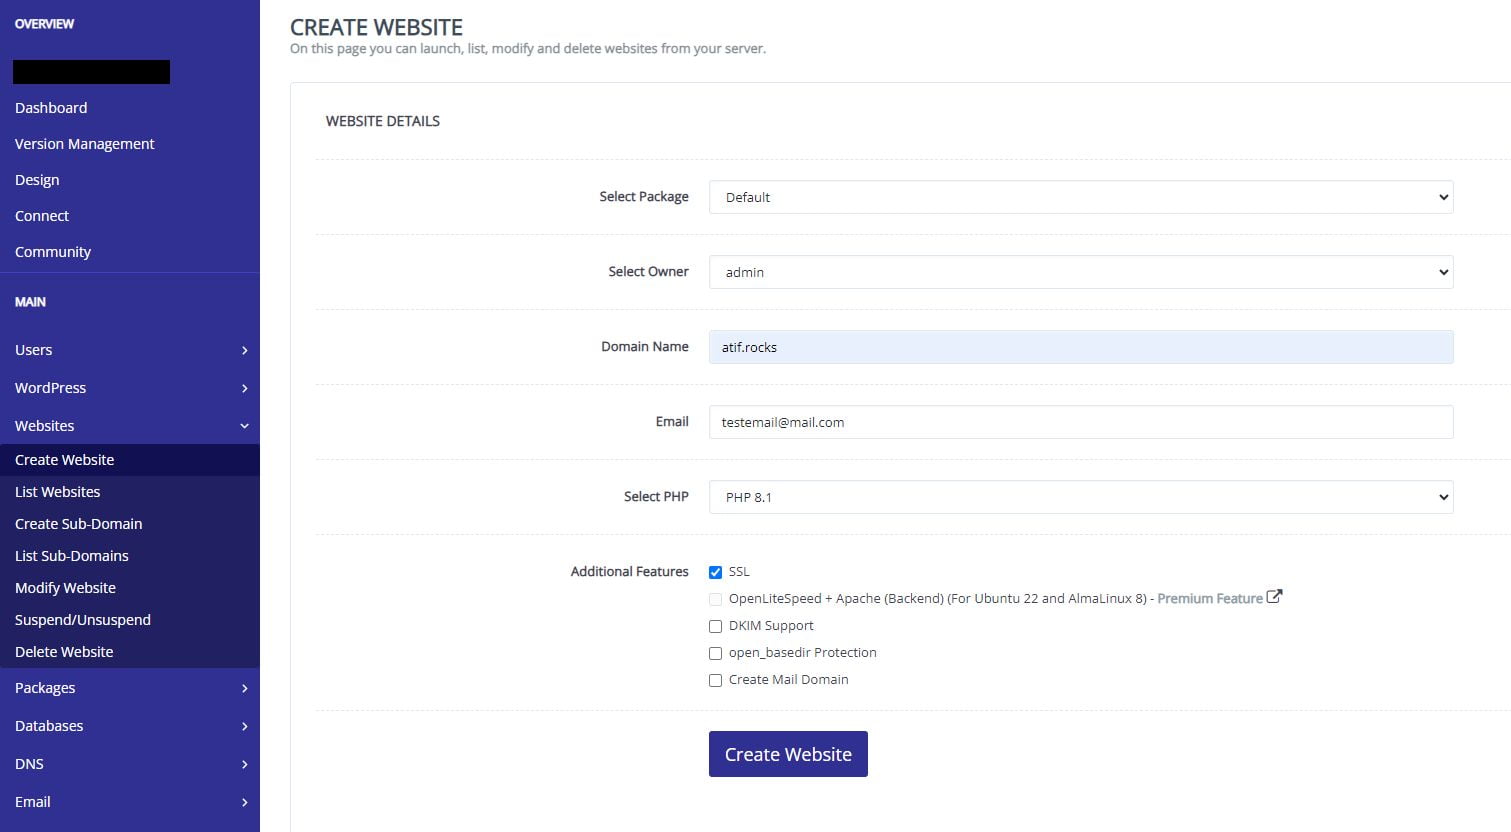
- .Login to CyberPanel and click on Websites on the left sidebar menu. Once the menu expands click on Create Website.
- On the Create Website page under the website details enter the information about your website as following.
- Select the default package.
- Select admin or your username as the site owner.
- Enter the domain name for you new website. Make sure to use the domain name you actually own and plan on using for this website. You an also use a sub-domain for example “dev.yourDomain.com” for “staging.yourDomain.com” to create development or staging sites for your main site.
- Enter your email address.
- Select the latest version of PHP available or any version you prefer.
- Check any of the additional features you want to install. You can install them later so leave them all unchecked for now.
- Click on Create Website button. Once the Website is created you will see a success message
Step 2: Create Database for the WordPress website in CyberPanel
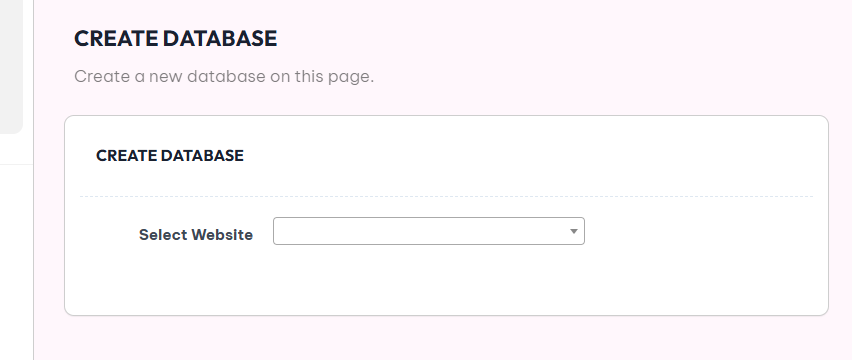
- Go back to the left sidebar menu and look for Databases. Click on Databases to open the dropdown menu and click on Create Database.
- Select the website you want to create database for, In our case we are going to select the website we created in last the last step.
- Choose Database Name, a User Name for the Database and the Password. Make sure to save the Password. Click Create Database button to create the Database.
- Once the Database is created you will see a success message.
Step 3: Install new WordPress website
- Go back to the left sidebar menu and look for Websites. Click on Websites to open the dropdown menu and click List Websites.
- Look for the website you just created and click the File Manger button. It will open file manage for your website listing the files and folder in root directory.
- Download the latest version of WordPress from WordPress.org
- Upload the zip file to the root directory of your website.
- Once the file is uploaded click on the uploaded zip file to select it. Find and click the Extract button to unzip the file.
- You will see a new directory Called wordpress listed in the root directory.
- Click and select the public_html directory. Click Delete button to remove the public_html directory.
- Click and select the wordpress directory. Click Rename button to rename the wordpress directory to public_html.
- Now browse the URL of your new website. You will see the WordPress installation page.
- Follow the installation instructions to complete the installation.


